At one time or another, we’ve all shot images at night. Whether it is the moon or Christmas lights or a lit scene there are certain rules that one must understand. The camera will not see and reproduce the vast EV differences in the lights and the surrounding objects except for the immediate objects that the light is falling on.
HDR can help compensate for a lot of the differences but probably not fully and separately shot images at ranging settings can help to a degree too depending on the end goal. After all, the moon is incredibly bright compared to a dark sky. That’s why you usually see an image of a full moon superimposed on an image of the scene.
Have you ever tried to shoot an image of the sun within a landscape. If the sun is exposed correctly you have with sun flares and the scene is dark or the scene is exposed correctly and the sun is way over exposed to where you can barely see it.
I think that the best solution is to mark the location and come back to shoot the scene (if you can) at a later date when there is still some daylight in the scene. Don’t let the sun go down to where the sky is black. Even a little daylight in the sky is better than black skies.
One possible solution is to not concern yourself with the correct exposure of the lights and bracket your shooting to over expose the scene. The lights will become brighter and you can pick up some ambient light as well. Many times, an overexposed scene can really bring out some very interesting results.
There is always the option of combining images to create a single image. This is usually done if the elements are of very different values of brightness. Like I said before, most images, if not all that you see at night with a full moon in it is a combination of images. The moon is just too bright to include detail in it with a dark sky too.
The supplied image is a combination of 2 images. The palm trees at dusk and the moon during an eclipse. It just wouldn’t have been able to record the moon and sky at the same time rendering detail like I wanted in the moon.
Learn MoreWhen shooting an object in the studio, it can be a challenge to get the desired lighting on the subject as well as the background. Generally this occurs when there are limitations of space or limitations of the lighting. Whatever the reason…when shooting objects on backgrounds, sometimes, the best way to go about getting the final product is to create 2 images and combine them, in Photoshop, to get the best results.
Quite a few times, I have concentrated strictly on lighting the subject exactly how I want and combine that image with a generated background to it later. The final image is one that appears complete and appears as though it was done completely in a studio.
This image is completed with that technique. The subject was lit in the studio and the background was produced later in Photoshop to get the final image.
Learn MoreASA determines the sensitivity to light of your camera’s sensor. The higher the number the more sensitive to light the image will be. A good example, a higher ASA/ISO rating would be a better choice during darker situations rather than a lower setting while a lower setting is better in a brighter situation.
The best ASA rating during daytime is a low setting of 100 or 200 where as in a darker situation (dusk or early evening) you would want to adjust the reading to a higher setting like 400 or 800. This is a basic concept giving way to a more important factor. Shutter speed.
The more important goal of an ASA rating, (regardless of the situation) is to keep the shutter speed high enough that “shutter blur” doesn’t occur. No matter how great an image is, if it’s not sharp, it’s worthless…that is, unless it’s a blurred image that you’re going for.
A good “rule of thumb” is to keep your shutter speed as close to the millimeter of your lens as possible. In other words, if you’re shooting with a 105mm lens you need place your shutter speed around 125/sec to eliminate “shutter blur” from occurring.
More times than not, this adjustment can be done with the balancing of shutter speed and aperture but there are those situations where you will need to raise the ASA rating to meet the shutter speed for sharpness. At this point ASA becomes your 3rd choice for correct exposure after shutter and aperture settings.
There are certain aspects that naturally occur when using a higher ASA rating concerning contrast, color saturation and noise but in critical moments you might have to ignore basic drawbacks, bite the bullet and get the shot!
A usable image is paramount above all things. If it’s not usable, you don’t get paid plus you may face embarrassment not to ever shoot for that client again. At very least…you lost your shot never to get it again.
Many times during my location photo sessions I’m adjusting my ASA rating. Think of it as a 3rd tool along with shutter speed and aperture adjustments rather than a setting that is unchangeable.
Learn MoreWhen I have clients call me for their personal photography, they generally are unsure of the location where they want their photos taken.
I have Real Estate agents that want their photos outside, landscapers that want their photos taken in their office and many others that just don’t understand where they should get their photos shot.
My first question to them is, “what kind of photos are you looking for?” Sounds simple enough. You would think that I have hit many people “Broadside” with that statement. Once I listen to them to discover the actual usage and the message that they would like to convey, I realize that they just haven’t wrapped their minds around the final product.
Learn More
Lighting is like music. Everyone has their own tastes and styles. There is no right or wrong about lighting, that is of course, unless you create an unusable image. Anything goes and who is to say that it’s not right? It’s all a matter of taste.
There were times that lighting had to be a certain style or it was considered wrong. For instance, back in the 50’s or 60’s, if it didn’t look like “Rembrandt” lighting, the photographer wasn’t considered as being accomplished. The main reason is that by understanding that type of lighting one had to understand direction, form, shape and so on. Today, because of many influences, paparazzi, improvements of on-camera flash technology, no one remembers Rembrandt, etc. there is a wide range of lighting that is acceptable.
Learn More
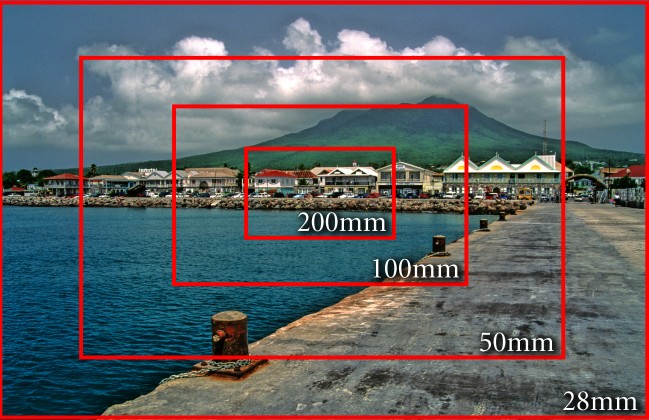
No matter what lens you have on your camera, you can take full advantage of it once you understand certain basic attributes of lenses. Whether it is a wide angle lens or a telephoto lens, knowing how to take full advantage of it can make for incredible photographs. The key, if limited to one lens is to get into what I call, the “Pre-Visual Mindset” of that lens.
A good example of this is, when I was in college, I changed from Pentax to Canon cameras. Since I was a student, I could only afford 1 lens for the new camera body that I had bought, while working at a well know camera chain. It took a while to decide what type of lens would offer me a large enough range of visual adaptations that I could shoot most anything with it. I decided on a wide angle lens. Not just wide but very wide…a 24mm.
Learn More